Set Up a Local MySQL Database#
For any project using a MySQL database, it is essential to be able to run your own copy of the database on your development machine. This enables you to test changes, and make potentially destructive mistakes without affecting your production website.
Step 1: Install MySQL#
Download and install the appropriate version of MySQL Community Server (CodeRed Cloud currently uses 8.0) from: https://dev.mysql.com/downloads/mysql/
Download the DMG Archive for your platform (ARM for Apple M macs; x86_64 for Intel macs)
Run the installer.
You will be asked to set a root password. Be sure to write this down or save it in a password manager. You will need it later!
Next, let’s add MySQL to PATH. If MySQL is not on the PATH, then you’ll get the error: command not found: mysql. In the terminal, open your .zprofile file as so:
% nano ~/.zprofile
Use the arrow keys to scroll down to the bottom of this file, then enter the following lines:
PATH="/usr/local/mysql/bin:${PATH}"
export PATH
Then to save the file, press the Control and X keys at the same time. Then press Y to save. Now quit and re-open the terminal for your changes to take effect.
In a new terminal, the MySQL command should now work:
% mysql --version
Download and install the appropriate version of MySQL Community Server (CodeRed Cloud currently uses 8.0) from: https://dev.mysql.com/downloads/mysql/
Download the Windows Installer (MSI Installer)
Run the installer.
Select Full Installation.
You will be asked to set a root password. Be sure to write this down or save it in a password manager. You will need it later!
Next, let’s add the mysql command to your PATH:
In the start bar, search for: Edit the system environment variables.
Click Environment Variables… near the bottom of the window.
In the top box, scroll down and click Path then click Edit….
Then click New and enter the following (replace “8.0” with the version you installed):
C:\Program Files\MySQL\MySQL Server 8.0\bin
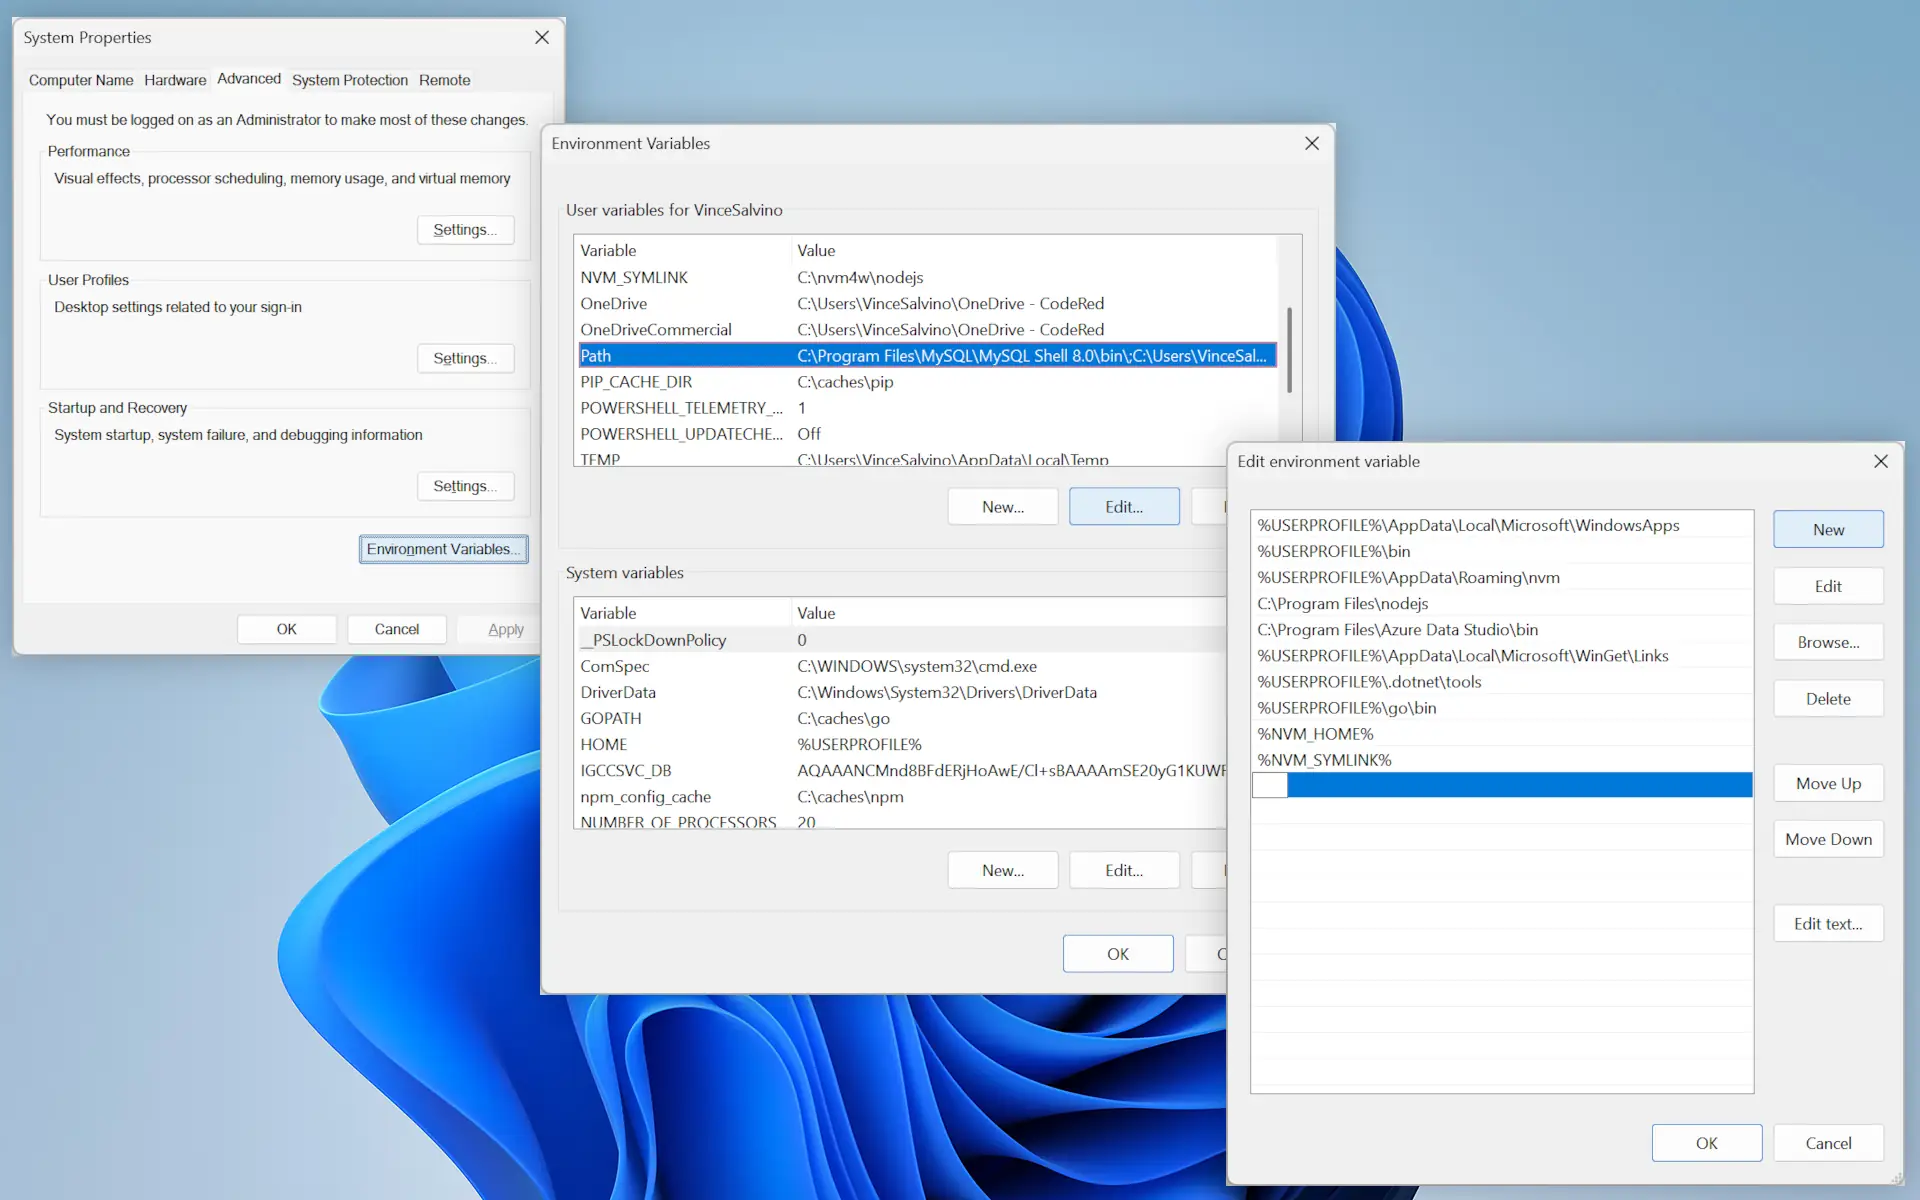
Now click OK in each window to close it and save the changes.
In a new terminal, the MySQL command should now work:
PS> mysql --version
Download and install the appropriate version of MySQL Community Server (CodeRed Cloud currently uses 8.0) from: https://dev.mysql.com/downloads/mysql/
Choose your Linux distribution and follow the instructions to install the package.
Step 2: Create a database#
Now that MySQL is up and running, let’s log in through the terminal as so:
% mysql -u root
PS> mysql -u root
$ mysql -u root
Enter your password, and now you’ll be in the MySQL console.
Next, let’s create an empty database. (TIP: If you previously created a database, and want to start fresh, delete it first using a “drop”.) If you’re working on a website hosted on CodeRed Cloud, you should name this the same as your CodeRed Cloud databse. Replace myproject with your database name below:
mysql> drop database myproject;
mysql> create database myproject;
To exit the MySQL console:
mysql> exit
Step 3: Load a database from backup#
Frequently our development databases become out of sync during the course of development, and it is helpful start fresh with a copy from staging or production.
For reference, database backups are usually referred to as a “database dump”.
If you are a CodeRed Cloud customer, download a backup from the dashboard under Websites > Backups. Then unzip the file and locate the myproject.sql file.
If you are not a CodeRed Cloud customer, then you’ll need to find your platform’s instructions for getting a database dump.
Now load the dump into your newly created database using the terminal:
% cat myproject.sql | mysql -u root -p myproject
PS> Get-Content myproject.sql | mysql -u root -p myproject
$ cat myproject.sql | mysql -u root -p myproject
Now your database is fully functional, and ready for development.
Step 4: Development connection strings#
If you’re working with a Django or Wagtail project, you’ll want to update your development settings to use your new local database. Edit your Django settings file (typically myproject/settings/dev.py) and add or edit the DATABASES setting:
DATABASES = {
    "default": {
        "ENGINE": "django.db.backends.mysql",
        "HOST": "localhost",
        "NAME": "myproject",
        "USER": "root",
        "PASSWORD": "<your password here>",
        "OPTIONS": {
            "charset": "utf8mb4",
        },
    }
}